This article consists of two parts. The first part briefly discusses what PowerApps is and describes the benefits of this solution. The second part is a short tutorial explaining the process of creating your first application using PowerApps.
What is Microsoft PowerApps?
Microsoft defines PowerApps as a collection of software and application services that work together to really accelerate the process of creation custom business applications.
At first glance, the most characteristic of PowerApps is the ability to create applications without the knowledge of any programming language. However, Microsoft can boast of many other benefits, including:
– possibility to connect PowerApps with other services such as Excel, SharePoint, Dynamics 365, SQL Server, OneDrive;
– innovative service for editing, creating and synchronizing data: Common Data Service;
Common Data Service simplifies the integration of business data from multiple sources. This service includes a common data model, consisting of multiple units that are common to different applications and business processes. The service stores data in a scalable and reliable manner.
– possibility to use the cloud during the entire application development process;
– ability to publish applications to users within a particular organization without having to publish applications in the store;
– ability to create advanced business applications combining the automation functions available in Microsoft Flow and Power BI (analysis functions);
What is more, the application can be run by a browser or on mobile devices with Android, IOS and Windows.
It can be concluded that the platform was created in response to the need to develop business applications inside the organization, without the need to cooperate with a team of programmers. On Microsoft.com we can read, who is the recipient of the PowerApps service. We can read that it is dedicated to “business analysts and other experts in creating applications using their skills”. However, it is also underlined that this is not the only type of users. It can also be used by people who “professionally write code (professional developers)” in order to create complex projects in a more convenient way.
In summary, what should be associated with PowerApps is: services in the cloud, the ability to use different data sources, rapid application development, intuitiveness in action.
The process of creating applications in PowerApps
Application development and administration are performed using the PowerApps Studio platform. You can access this environment through the Windows application and through the web.powerapps.com website. You can run related application from Microsoft Dynamics 365 and in Office 365 account or from an app called PowerApps Mobile (available for Windows, Android, IOS).
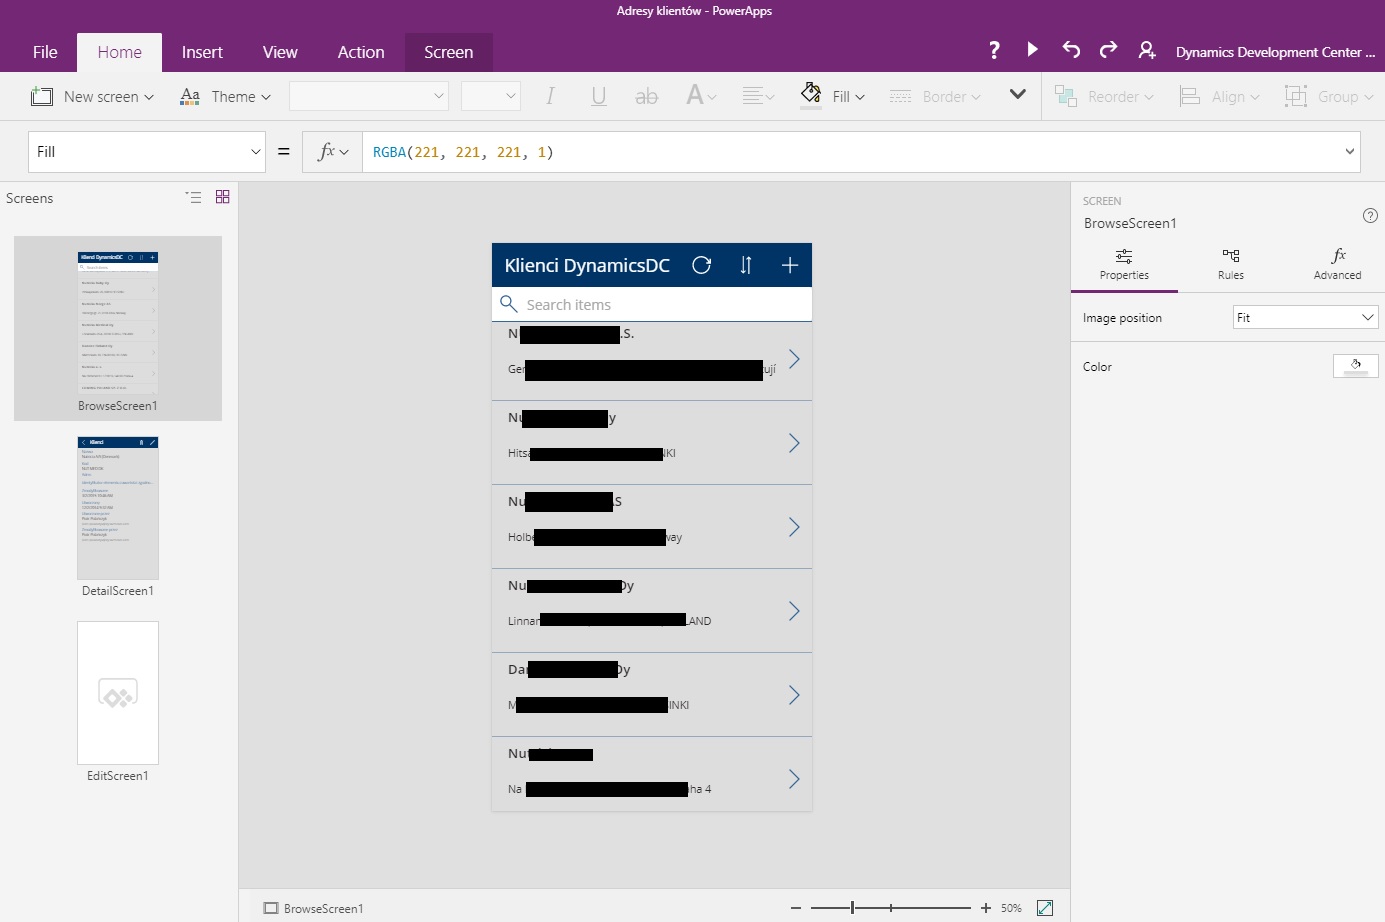
Let’s have a look at the PowerApps Studio interface. In my opinion, the interface is very simplistic compared to the extensive environment of Visual Studio. Interestestingly, what we can notice from the start is the formula bar known from Excel. In addition, Microsoft notes that the transition between screens can be performed by using a ribbon, it looks very similar to the transition between slides in PowerPoint.

Pic. 1: User interface in the PowerApps Studio application
The first application created with PowerApps
After this brief look at the user interface let’s go to the next part of this article: tutorial. A tutorial describing the process of creating your first application.
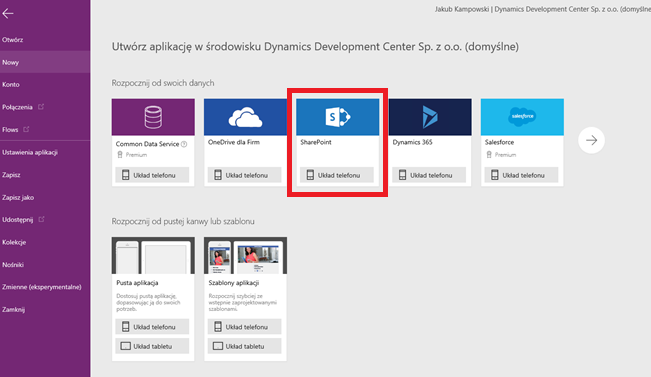
After installing PowerApps, create a new project.

Pic. 2: Creating a new project in PowerApps
As you can see in the screenshot above, PowerApps offers the ability to start developing applications using data from multiple platforms.
In this example, we selected data from SharePoint.
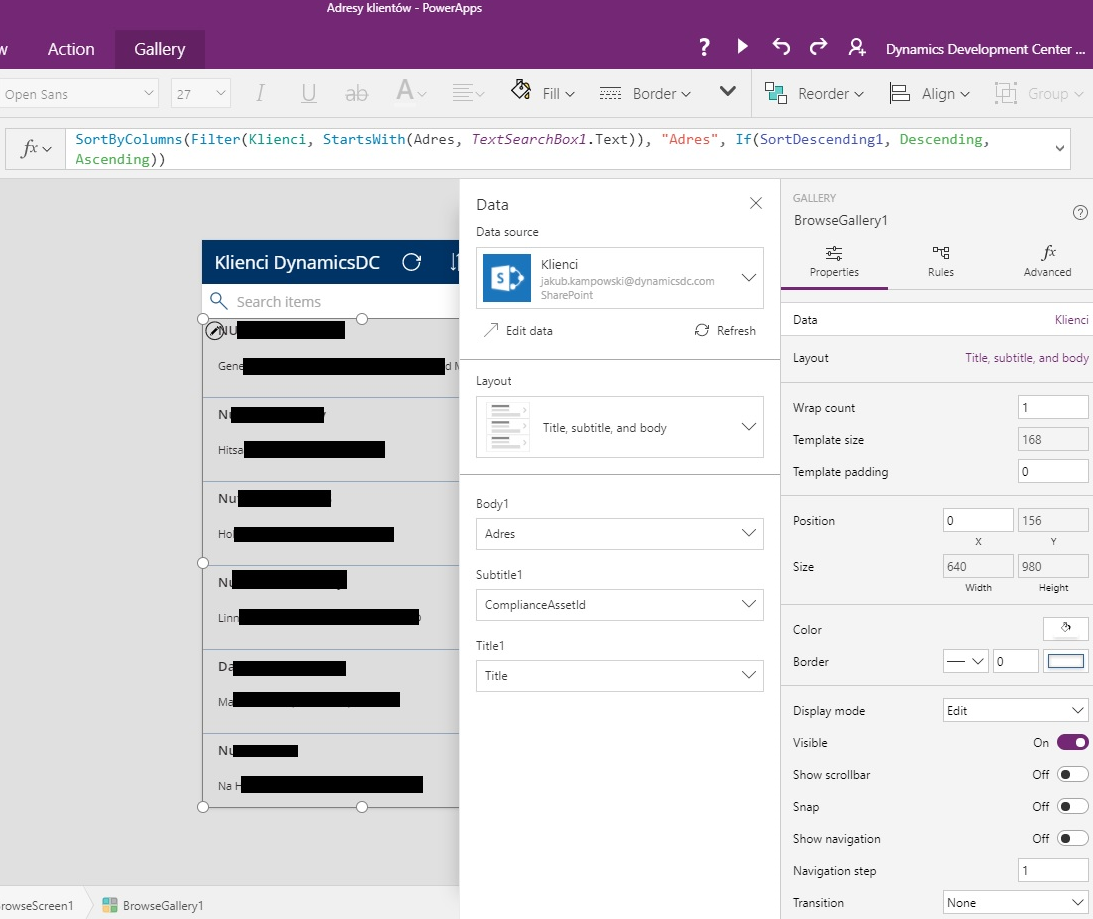
After connecting to the selected object on SharePoint, PowerApps will generate an app with three screens. This way we quickly get the basic data model of the application, we can view, add and edit our data using this new app. Now, our task is customizing the controls. and selecting the data according to our needs. In the example, the app shows appropriate data (company name and address) as the list of items. When auser clicks on the selected item, he will go to the detailed information about the specific company.

Pic.3: Editing the properties of the controls and selecting the data source.
After configuring the application according to our needs, we can now customize the application. The PowerApps Studio environment allows you to adjust the layout in an intuitive way and choose the right color theme.
At this step, we only have to publish the application. To do this, simply enter the e-mail addresses of people who are in the same organization. In addition, we can quickly launch the newly created application on a mobile device using a dedicated application PowerApps Mobile.
