We are pleased to present the Invoice Mail Queue. This is new add-on (extension) created by EIP Dynamics Team! It will be available on Microsoft App Source very soon. With this add-on you can send a large number of documents from Business Central directly to your customers email addresses. The process is really convenient and fully automated.
Invoice Mail Queue features:
- Possibility of defining templates of sales documents and assigning to them various parameters and printouts,
- Possibility to define own body emails,
- Sending sales invoices, quotes, orders and even sales reminders.
- Controlling documents in a dedicated IMQ panel.
How does it work?
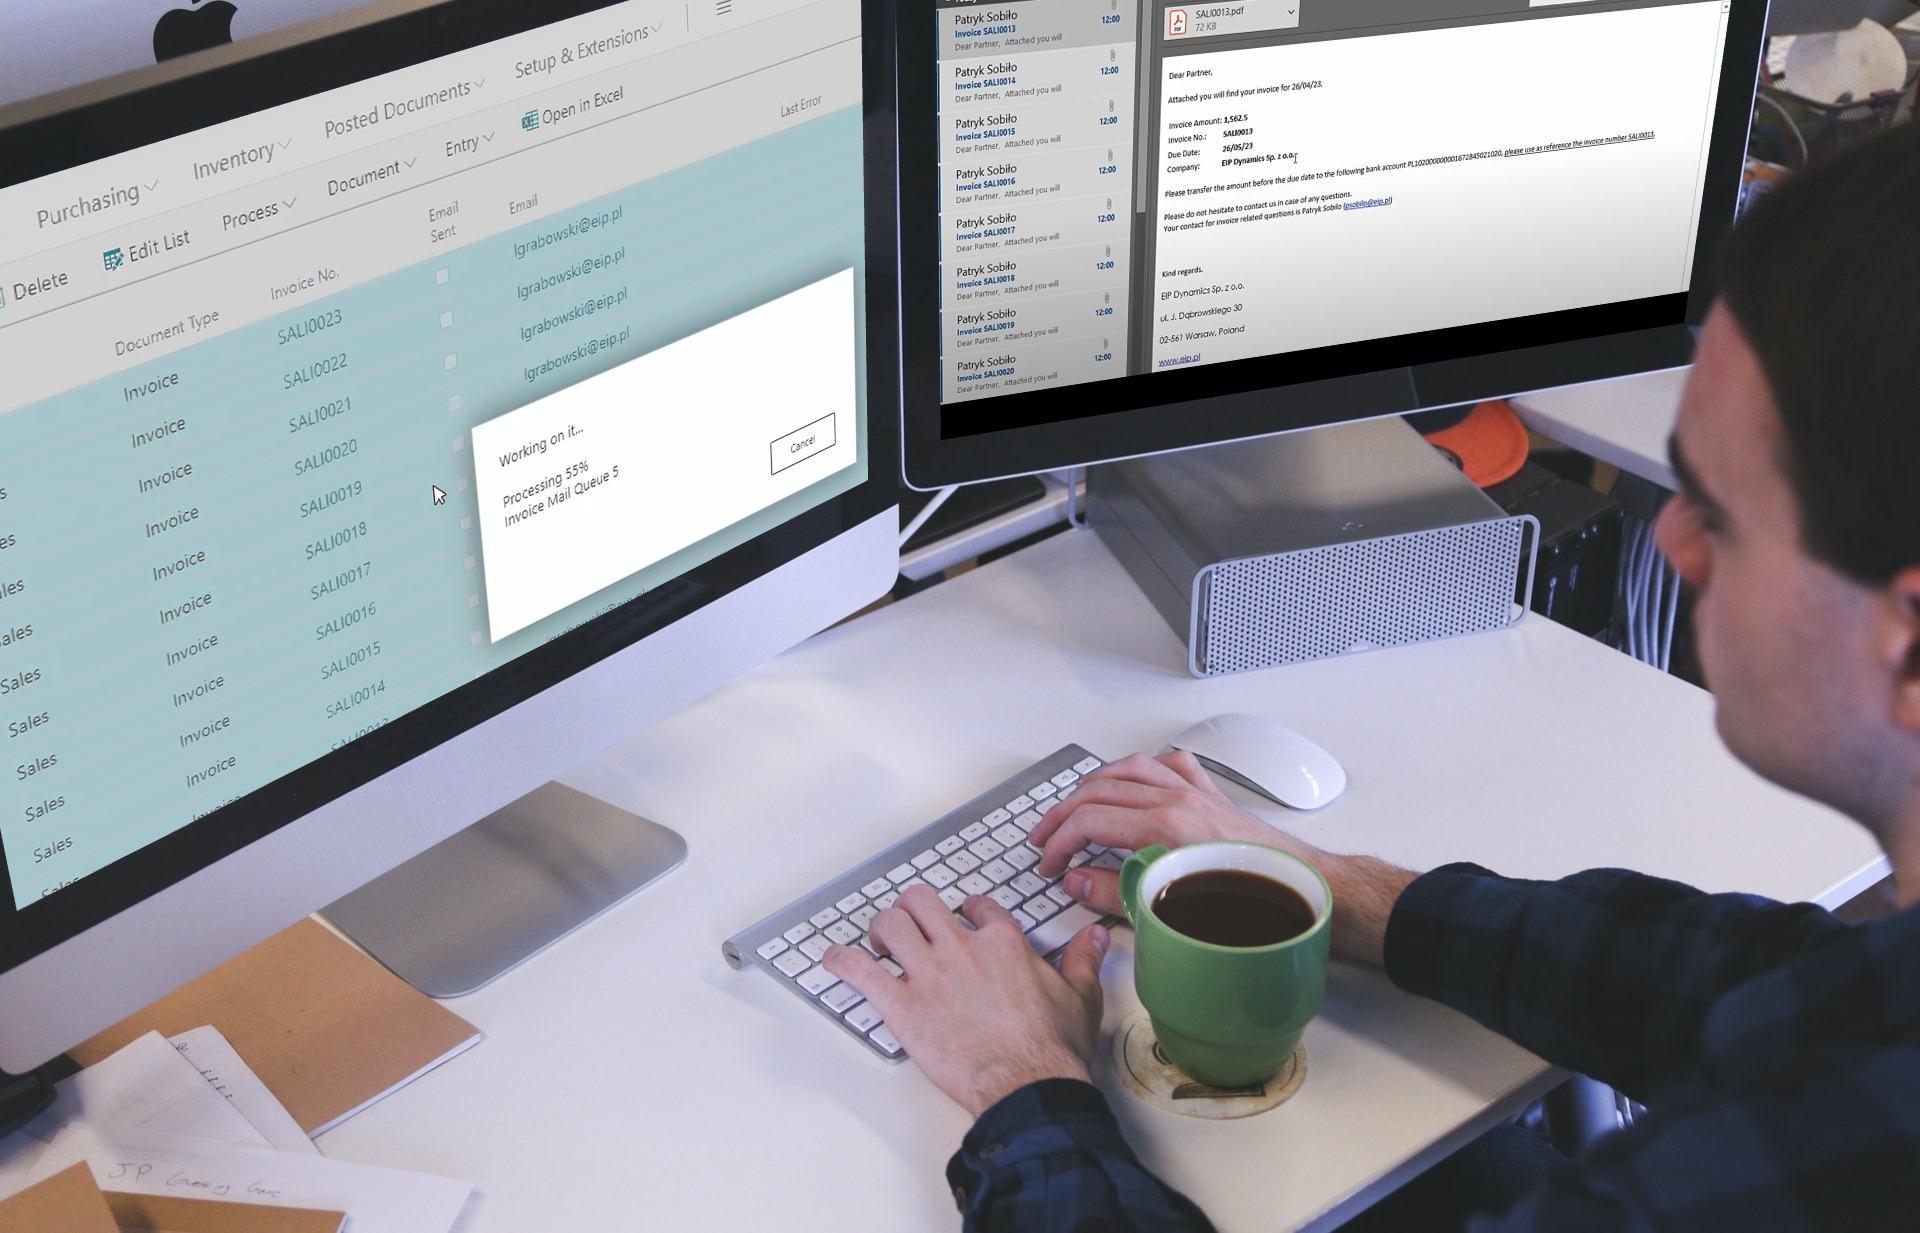
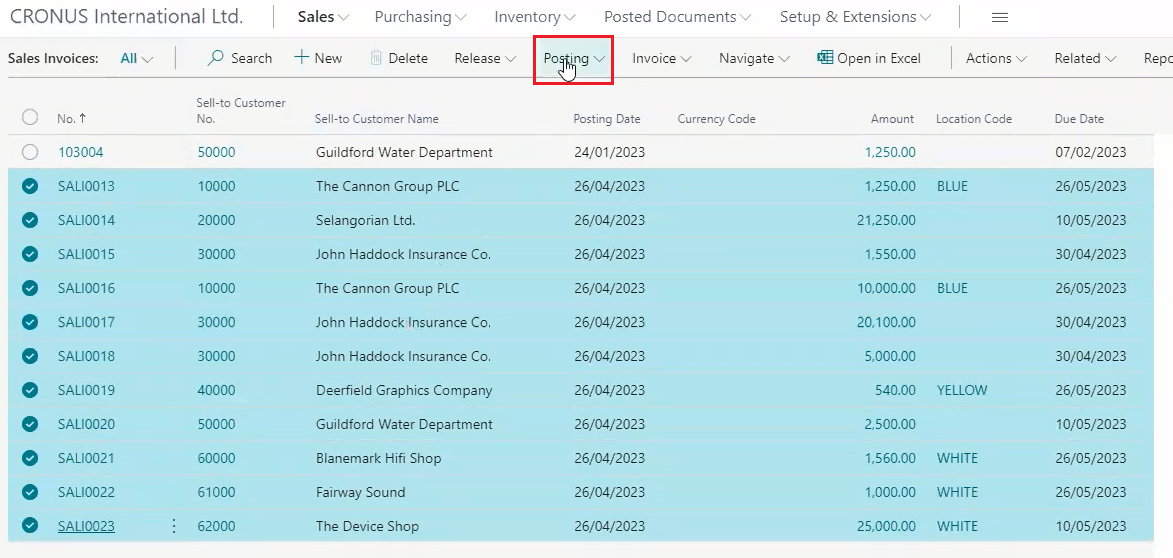
Let’s imagine, for instance you have a lot of sales invoices. Just in few clicks you can select all appropriate invoices and click “Post”. In the screenshot below, 11 documents are selected but in practice of course you can use it for large number of invoices, for example 10K or more.
After that you will see the information about processed documents “All the documents were processed”.
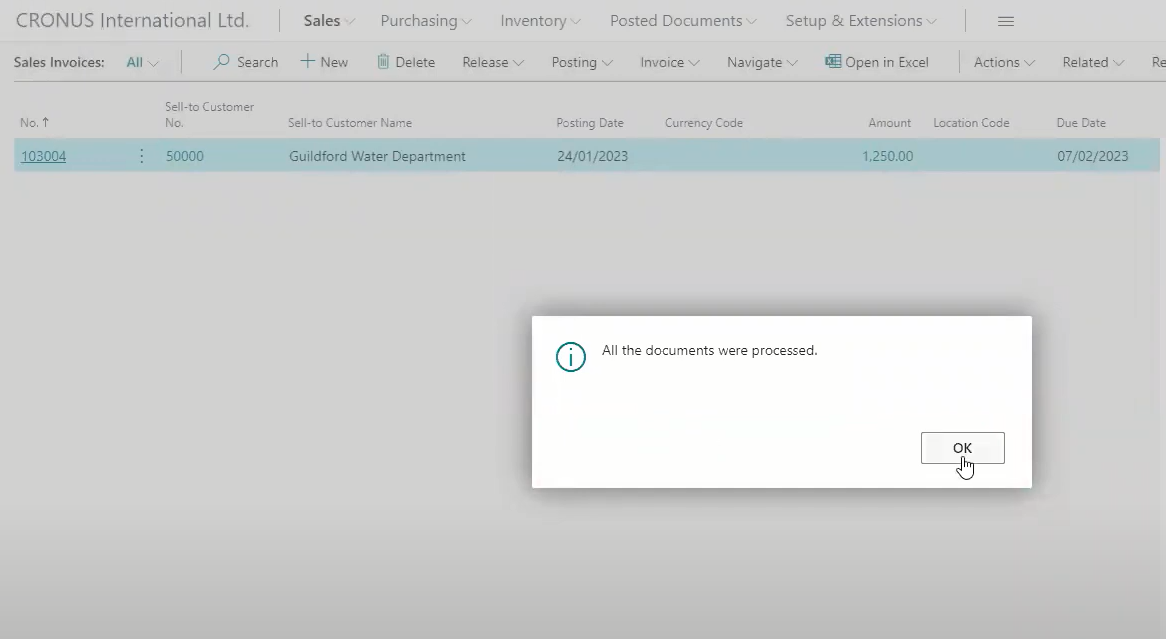
After clicking “ok” you will see invoices has disappeared from the list because on Business Central and are automatically moved to posted sales invoices list – and well, this how standard works.
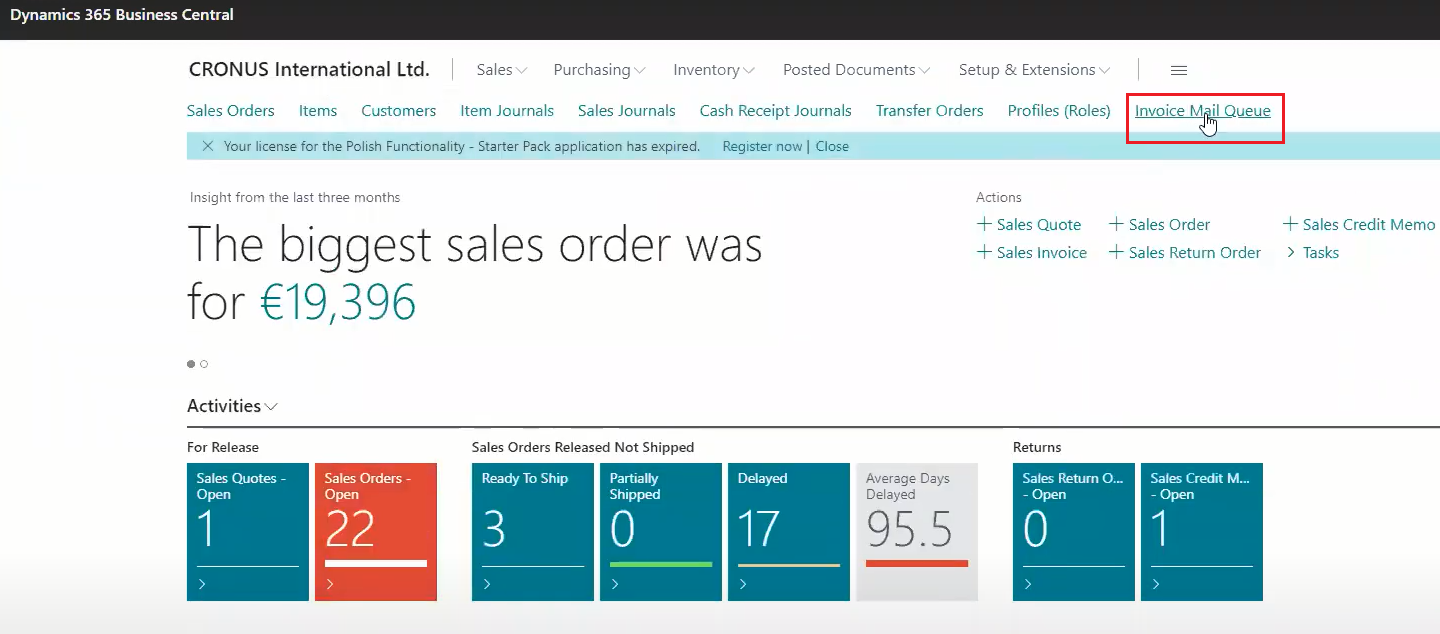
But in addition to that, the invoices are also moved to dedicated Invoice Mail Queue view. In the next step just go to the main center and click on Invoice Mail Queue.
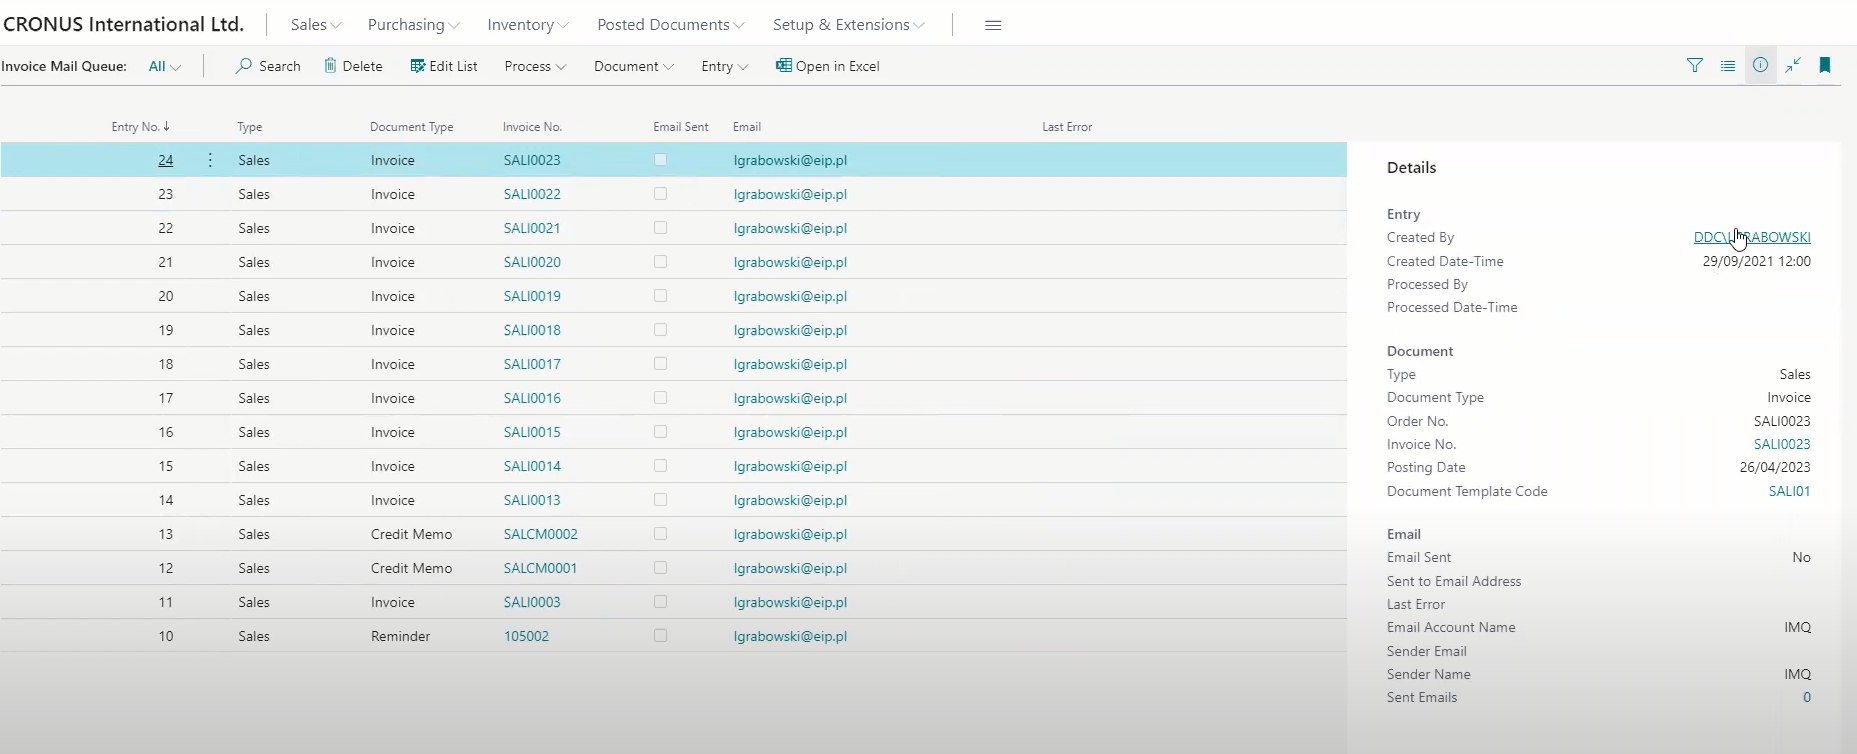
On the page of Invoice Mail Queue, you can find the invoices but not only! All your documents, that are set up to be send to customers once posted, are waiting for sending.
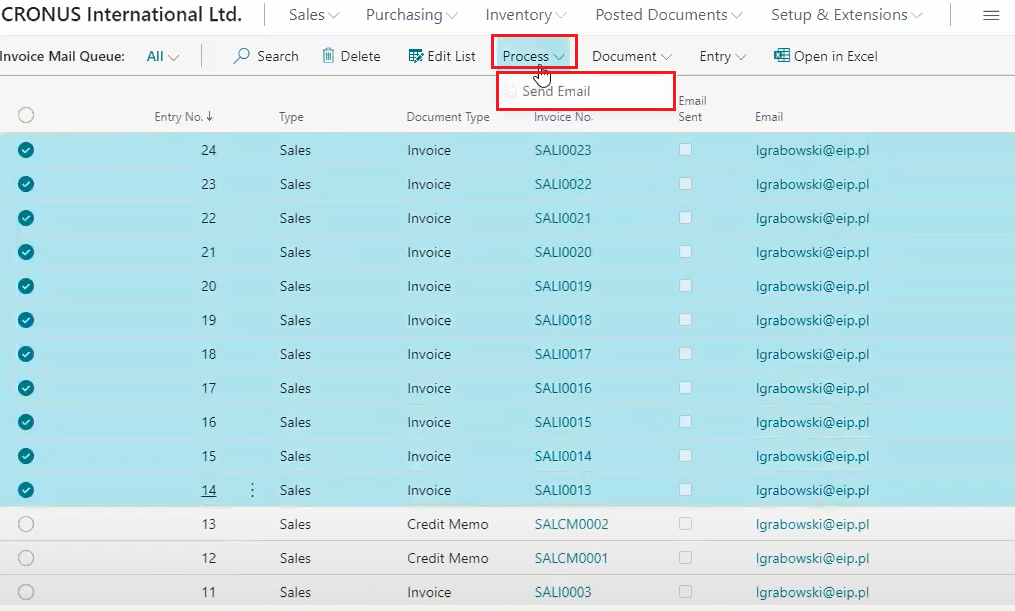
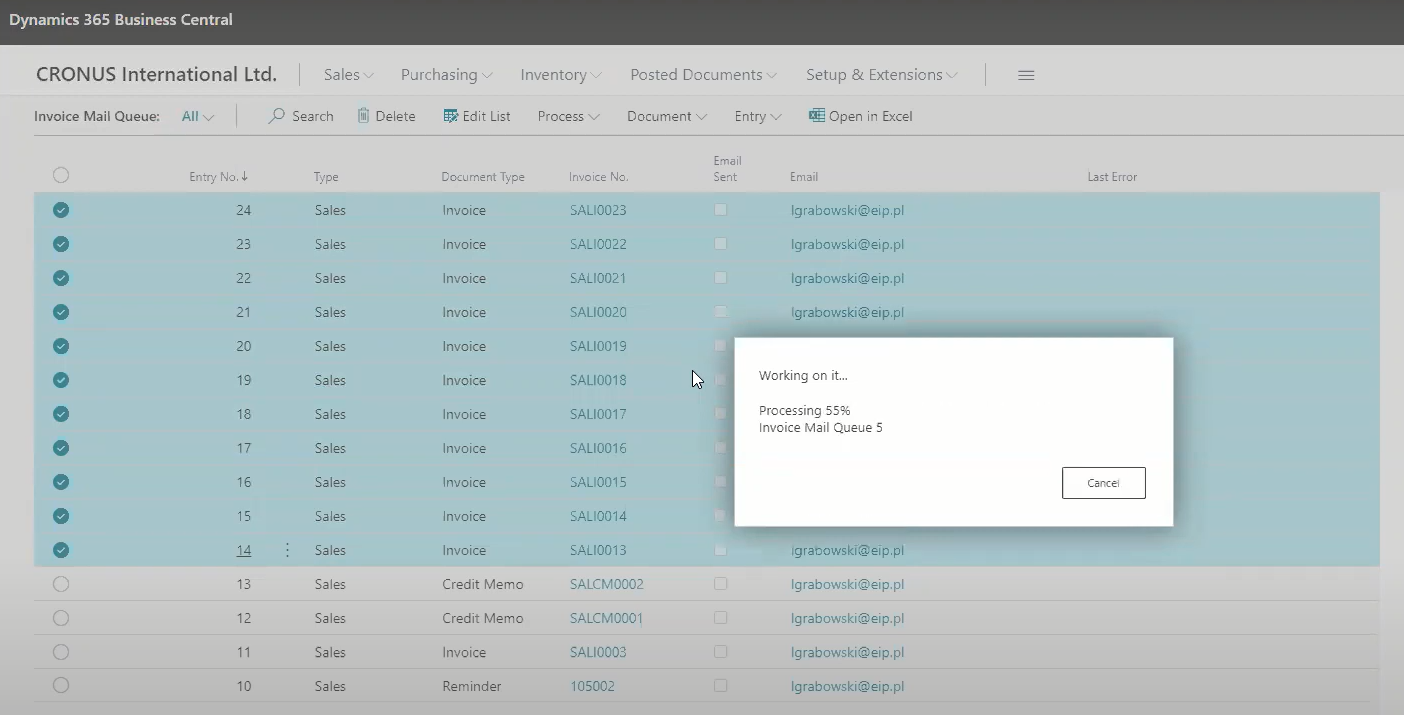
To send invoices just select invoices and click Process -> Send Email.
After clicking Send Email, you can see information about rendering documents. All happened in the background so it’s not a problem even if you use large number of documents.
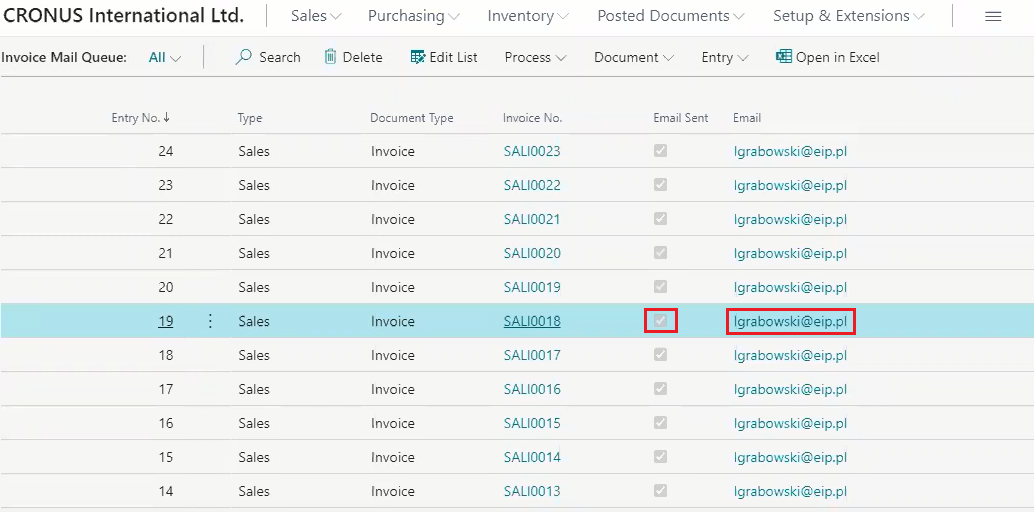
After that, definitely look for a details:
- Once email was sent, you can find tick on the “Email Sent” column (marked with a red square in the screenshot below),
- Find more details by opening the FactBox pane, see who and when has processed the invoice,
- In addition, on the “Email” column you can you can check where the invoice was sent (for example lgrabowski@eip.pl).
Please note that: all steps presented above can be done fully automatically. You can set up that: each invoice is transferred to the Invoice Mail Queue and immediately sent to the appropriate email address. It’s not always necessary to click “Send Email” button on the Invoice Mail Queue page.
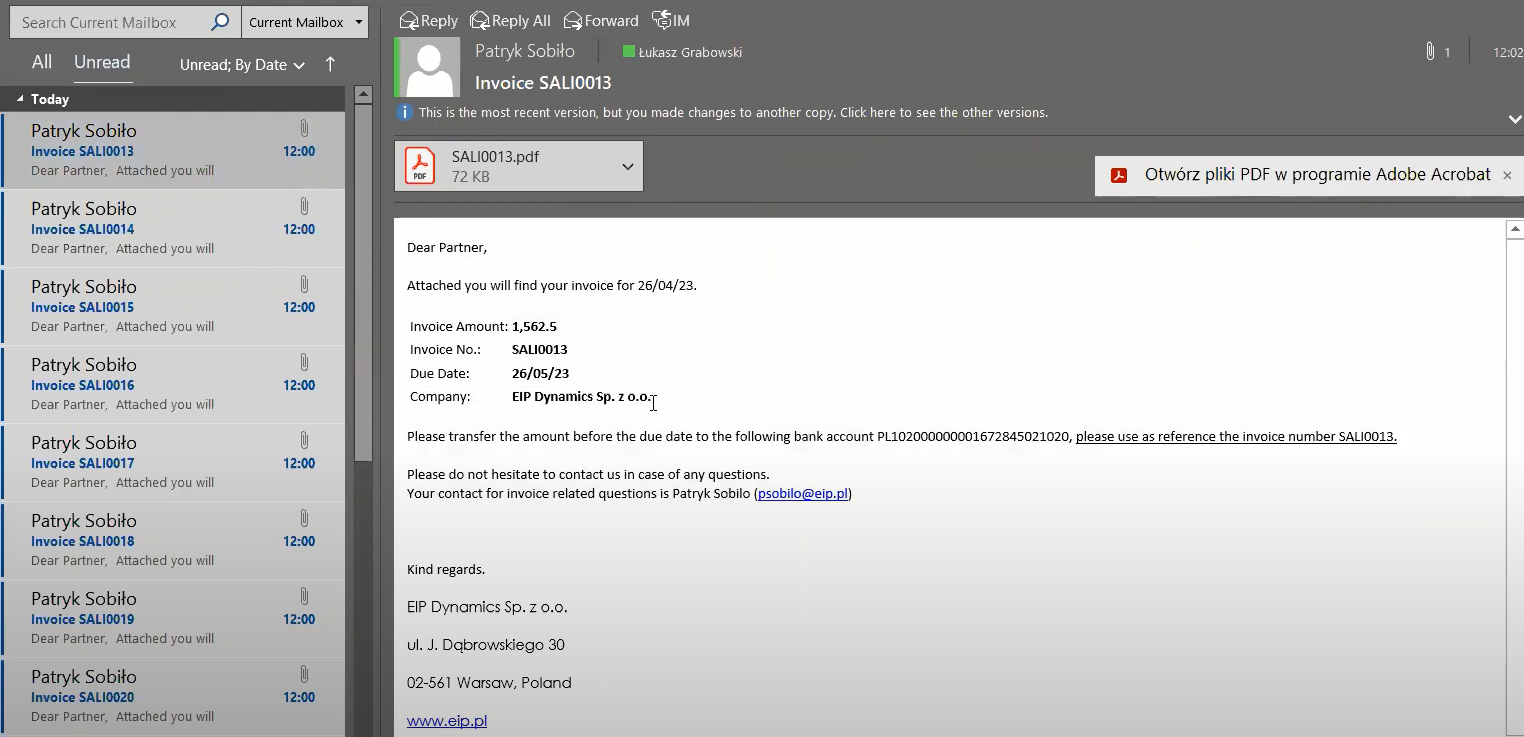
In the last step, everything you should do is open email with your documents from Dynamics 365 Business Central.
- In the email body you can find details about attached document (for example invoice amount, invoice number, due date and name of the company).
- You can also set up your own comment, for example “please transfer the about before the due date to the following bank account (..).”.
- Of course, you can also add an e-mail footer. In result email looks very naturally and convenient.