How to start using .NET Framework to extend Microsoft Dynamics NAV features? Read more on our blog.
.NET Framework is a development platform, developed by the Microsoft company. This platform includes creating new applications for the Microsoft operating systems. .NET provides us class libraries and runtime environment (CLR), which give us tools and functions for applications. Programming languages that we can use on this platform include: C#, J#, C++, VB.NET.
The most popular language in every day work is C#. It’s based on the C language, constantly supported and developed with additional functions.
.NET Framework has its own structure, which we can divide as follows:
- Class libraries (e.g. ASP.NET, Web Services, Web Forms, XML, ADO.NET etc.)
- Own runtime environment (CLR)
- Visual Studio .NET
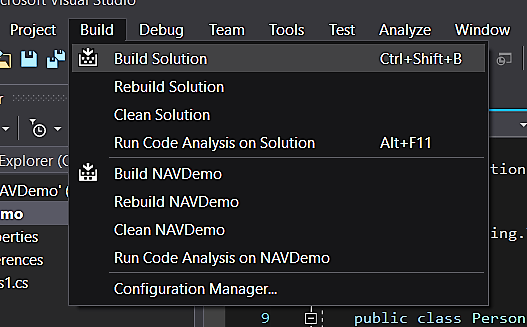
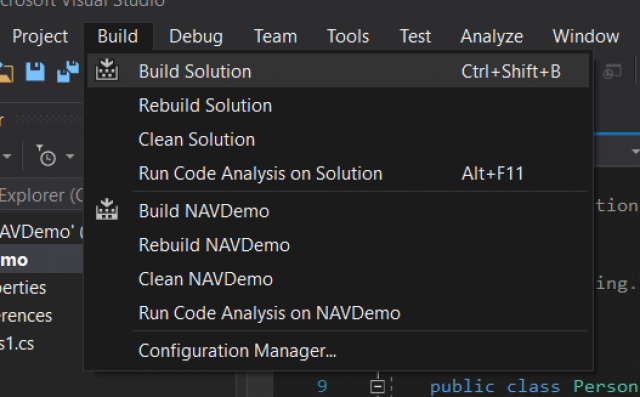
There are two possibilities for implementing .NET libraries in Dynamics NAV.
- We can use ready-made DotNet library (we have to create new variable with DotNet data type and select library from the list.
- We can create new .NET library.
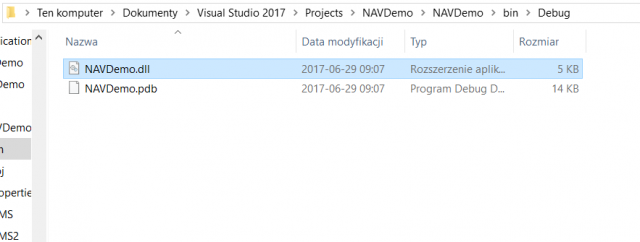
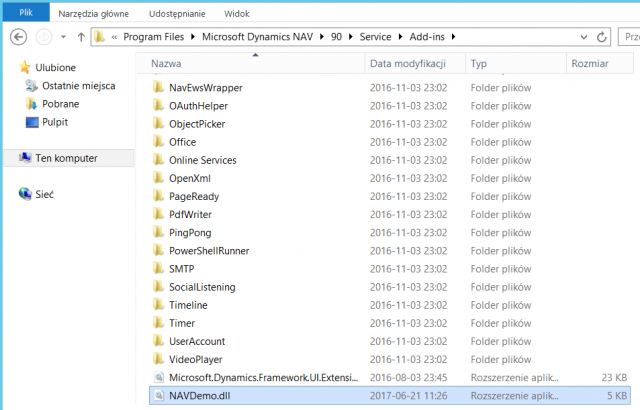
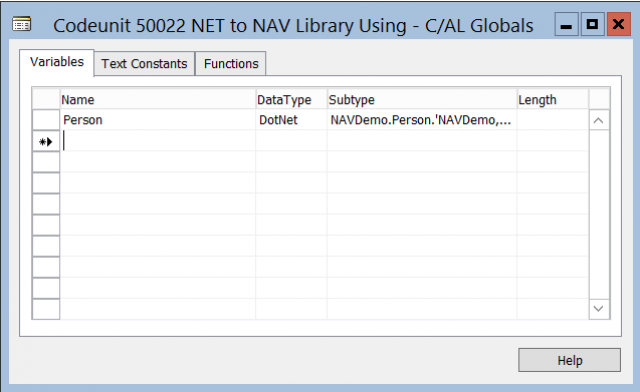
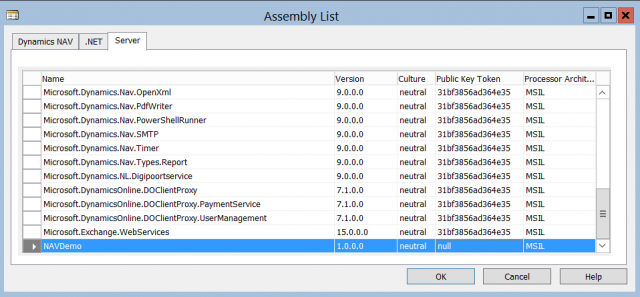
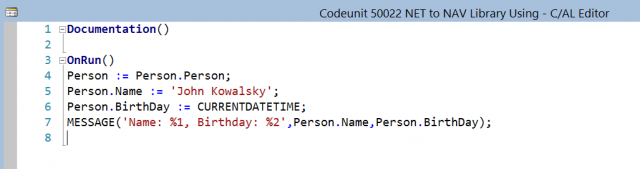
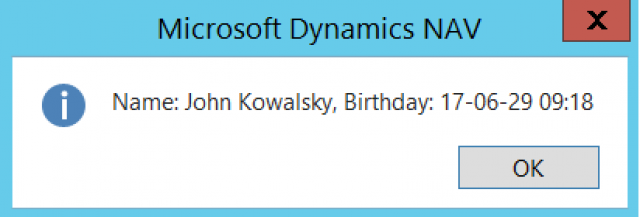
This example can illustrate, how to implement own .NET scripts in Dynamics NAV.
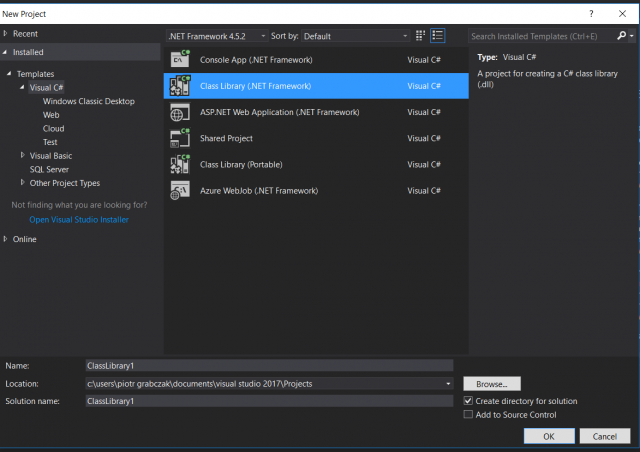
Step 1. Run Microsoft Visual Studio (e.g. free version of this program Visual Studio 2017 Community) and create new project. Click on the File tab and then New – Project.
Step 2. On the list, find Class Library (.NET Framework) and set project name in Name field.
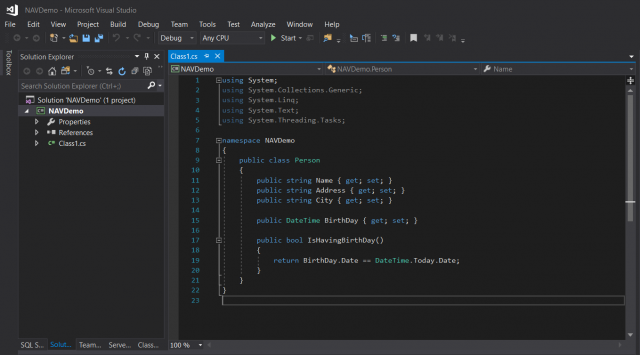
Done! You implemented your own .NET class library in Dynamics NAV.