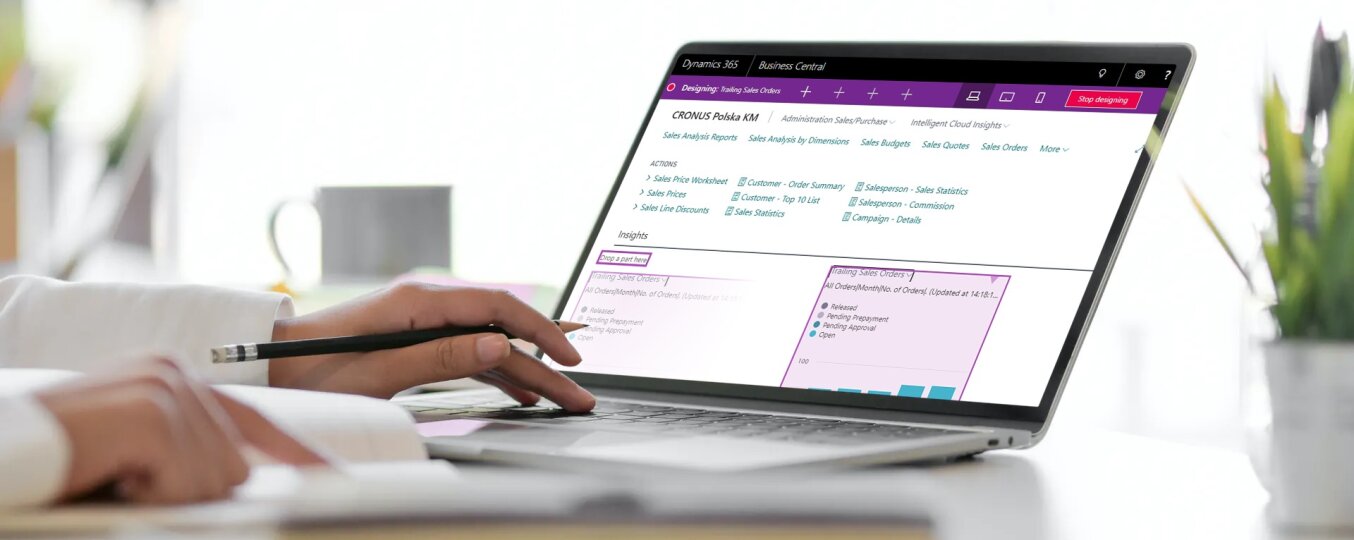
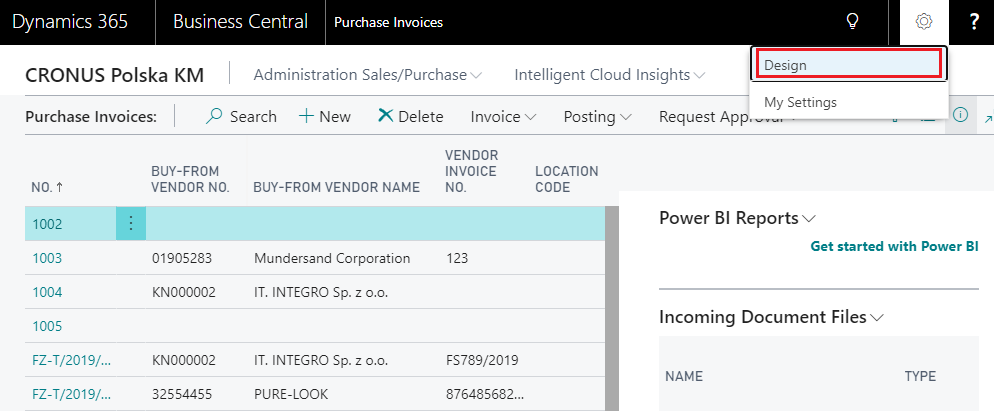
You can personalize the system by selecting the appropriate role, e.g. Chief Accountant, IT Department Manager, Project Manager, Machine Operator etc. Dynamics 365 Business Central, apart from the predefined layouts typical for selected positions (eg Chief Accountant), allows you to personalize individual elements on the screen to your own preferences. To do this, click on the gear icon in the upper right corner of the screen. Then click on Design.

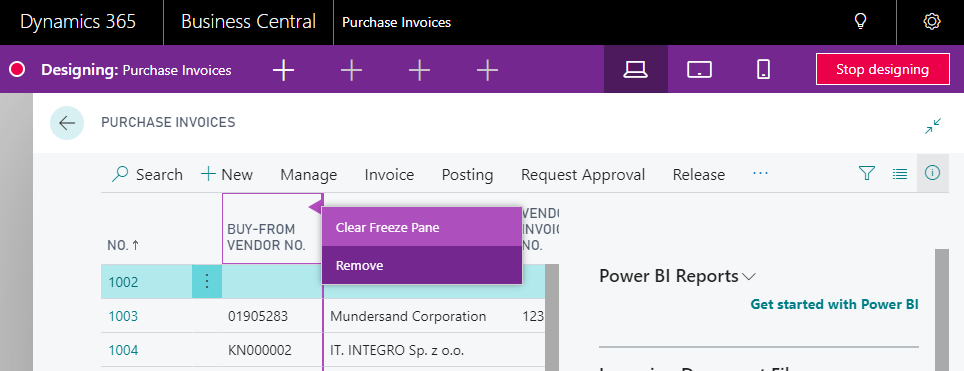
Then a purple box appears at the top of the screen to indicate you are in design mode.

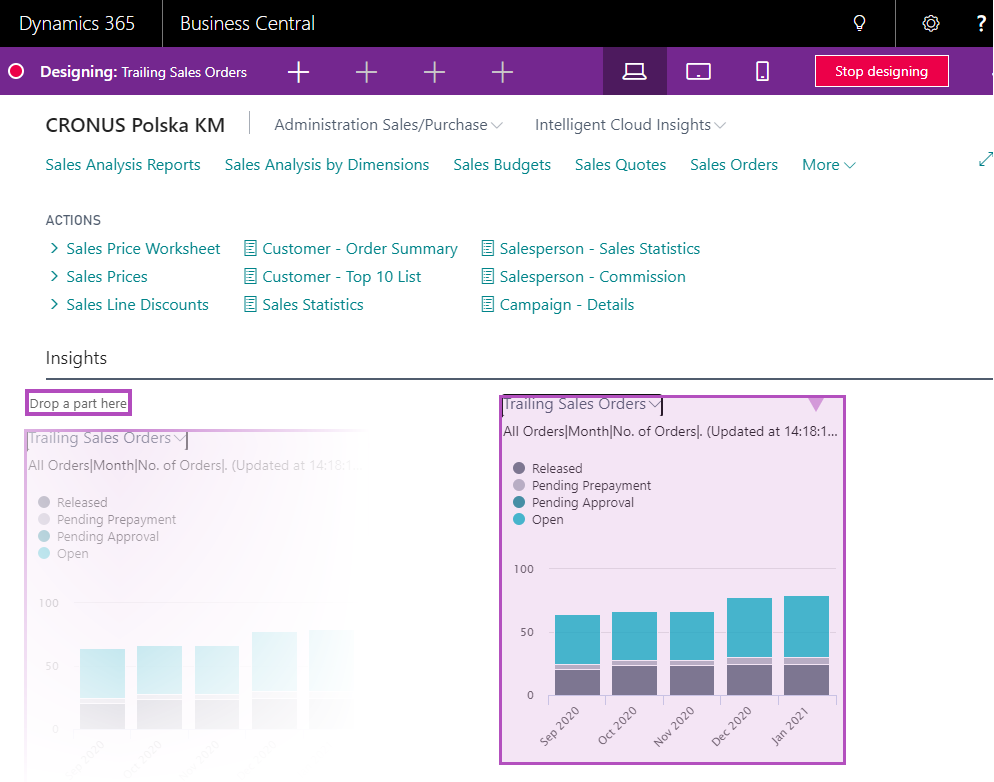
It is worth noting that you can choose from the monitor, tablet and phone views. Therefore, personalization can also apply to mobile devices.
When we hover over a specific element on the screen, a purple frame will appear with a list of available options. In the example below, “Clear Freeze Pane” and “Remove”.
Design mode allows you to change the position of individual elements using the well-known and convenient “drag and drop” method. Thanks to that personalization of the screen is very fast and intuitive.
In the example below, “Trailing sales orders” are dragged from the right to the left column. An intuitive semi-transparent glow of the selected element appears when you drag.
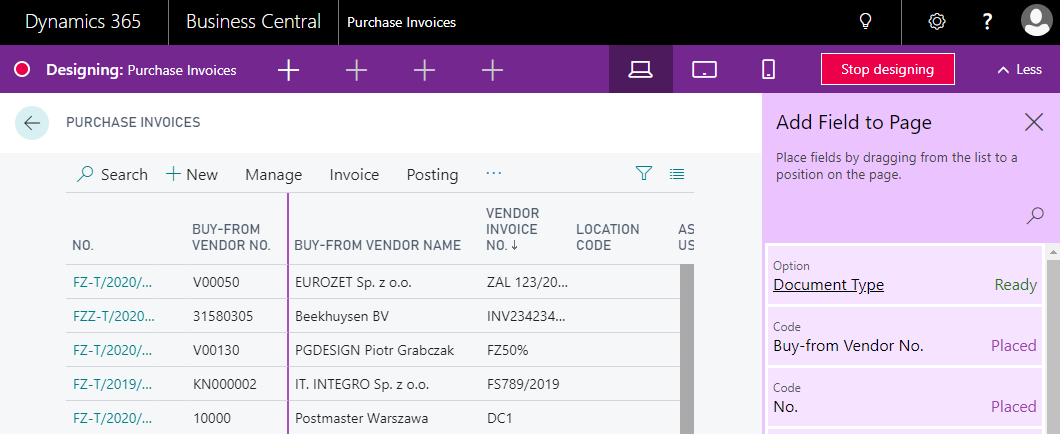
Moreover, depending on the section selected, specific fields can be added to the page. To do this, just click the plus sign at the top of the screen (in the purple field). In the example below, you can add fields for a purchase invoice (e.g. Document Type or Buy-from Vendor No.).
It is worth noting that the changes made will only be visible on your screen. Don’t worry about the modifications you make will also be visible in your colleagues profiles.
By carefully adjusting the elements on the screen to your own needs, you can significantly increase the efficiency of work with the system.